2004-2005 Mercury 200-275 Verado Cowl Removal and Install
The title “2004-2005 Mercury 200-275 Verado Cowl Removal and Install” refers to a set of instructions or guidelines for taking off and putting back the protective covering (cowl) of Mercury boat engines from the Verado series, specifically those manufactured between the years 2004 and 2005, and with power ranging from 200 to 275 horsepower. This information explains step-by-step how to safely remove and reattach the cowl, which is the outer shell of the engine, allowing access for maintenance, repairs, or other necessary tasks.
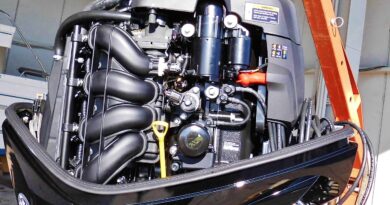
Performing maintenance on your Mercury 200-275 Verado outboard engine requires access to its internal components, which can be achieved by properly removing and reinstalling the cowl. Here’s a step-by-step guide to help you through the process:
Cowl Removal:
- Preparation: Before you begin, ensure the engine is turned off and cool to the touch.
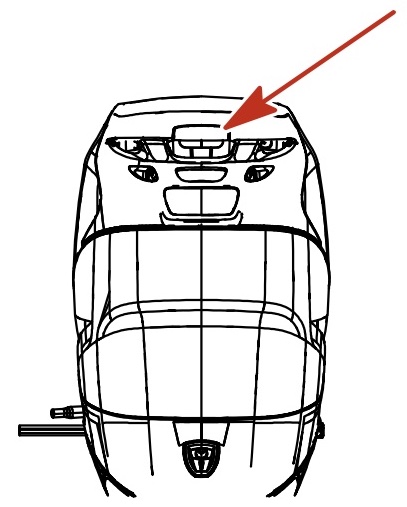
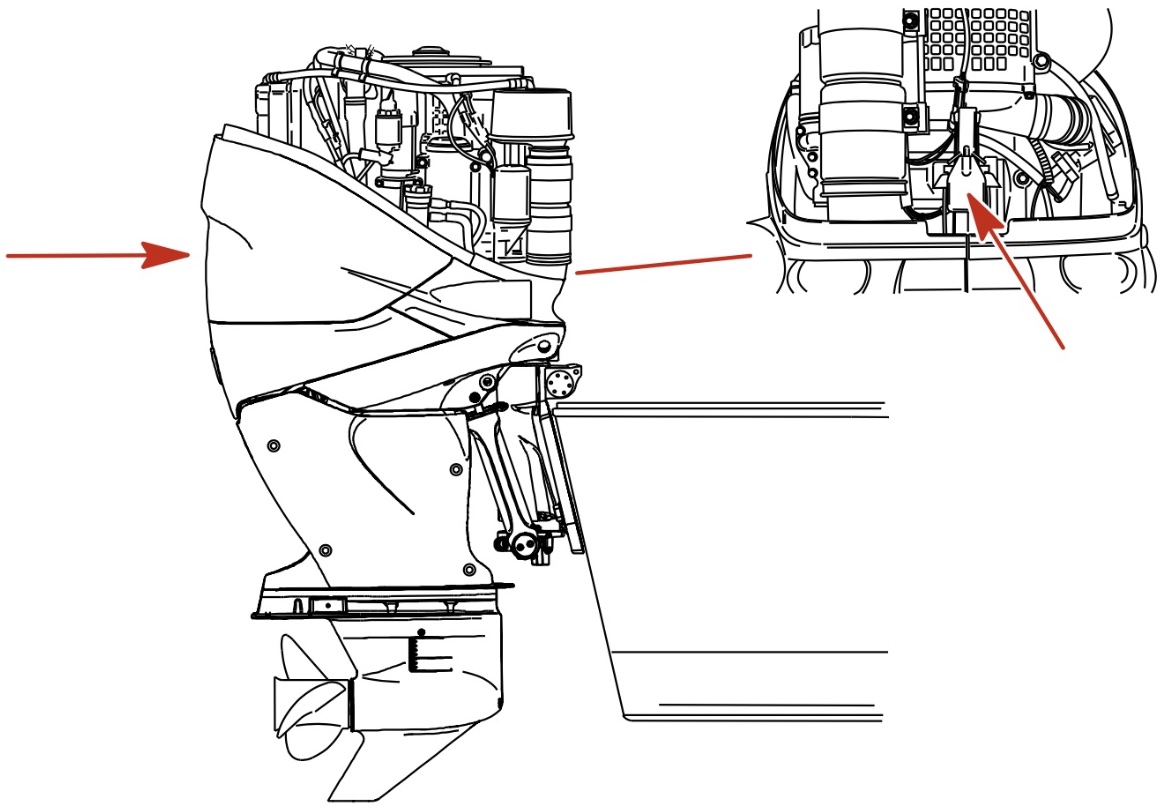
- Access the Top Cowl: Most maintenance points can be accessed by removing the top cowl. Locate the top cowl lock latch situated near the rear of the cowl. Pull up on the latch to release the lock.
- Remove Top Cowl: Pull up on the top cowl lock latch. With the latch released, gently pull the top cowl forward. As you do so, lift it off the engine. Set it aside in a safe location.
To remove: Pull up on the top cowl lock latch. - Access the Rear Cowl: To completely access the engine, you’ll need to remove the rear cowl. This cowl is located towards the back of the outboard. Carefully lift and slide it aft to remove it.
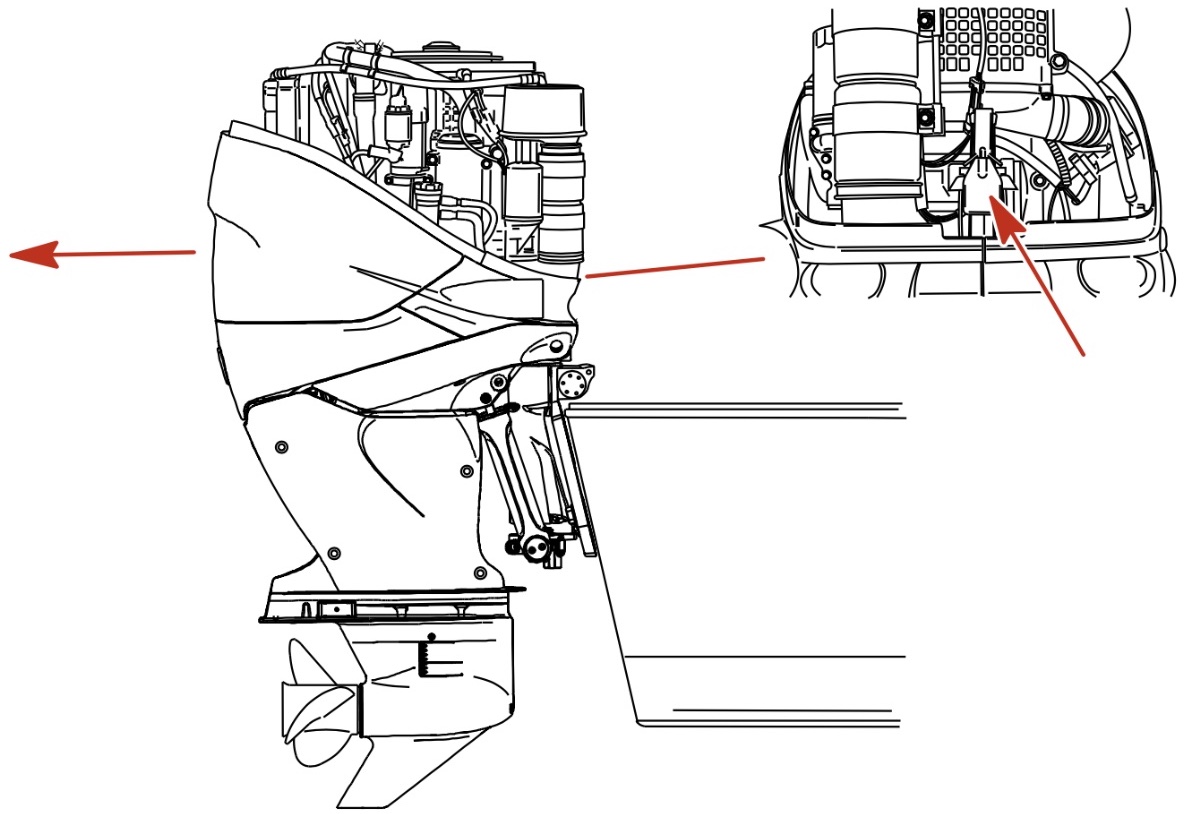
To remove rear lower cowl pull release latch up.
Cowl Installation:
- Proper Positioning: Begin by positioning the lower cowl at the aft side of the outboard. Ensure that it fits snugly into the rubber seal.
- Lock the Lower Cowl: Once the lower cowl is properly positioned, secure it in place by pushing down on the lower cowl latch. This will lock it securely.
Lock cowl in place by pulling lower cowl latch down. - Position the Top Cowl: Place the top cowl back into position over the engine, starting with the front end. Ensure that the cowl fits snugly into the rubber seal.
- Lock the Top Cowl: To lock the top cowl in place, apply downward pressure to the back side of the cowl. You’ll feel and hear it click into place. Verify that the cowl is securely fastened by gently pulling up on the back of the cowl.
Cowl Exterior Care:
- Protective Finish: The Mercury Verado outboard engine features a durable baked enamel finish, which provides protection against the elements.
- Regular Cleaning and Waxing: Keep your outboard’s cowl looking its best by regularly cleaning and waxing it. Use marine-specific cleaners and waxes for best results.
- Avoid Textured Areas: When applying wax, avoid waxing textured areas of the cowl. This will help maintain the appearance and integrity of these surfaces.
By following these steps, you’ll be able to confidently remove and install the cowl of your Mercury 200-275 Verado outboard engine for maintenance and care. Properly maintaining the cowl will not only make your engine look good but also ensure its longevity and performance.