How to Replace 2005 Dodge Caravan Ignition Coil
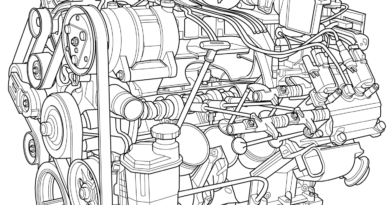
An ignition coil, found in the engine of a 2005 Dodge Caravan, Grand Caravan, or Chrysler Town and Country, is an important component that helps generate the spark needed to ignite the fuel-air mixture in the engine. The coil assembly, made up of two or three separate coils that are joined together, performs this crucial function. In the 3.3/3.8L engine, the coil assembly is located on the intake manifold, while in the 2.4L engine, it is positioned on the cylinder head cover. Each cylinder in the engine is connected to the coil through spark plug cables, ensuring that the spark reaches the right place at the right time to power the combustion process.
This article will provide you with the factory-recommended removal and installation procedures, enabling you to confidently and correctly change the ignition coil. The ignition coil replacement procedures apply to the following 2005 models:
- Chrysler Caravan – FWD
- Chrysler Town & Country – FWD
- Dodge Caravan/Grand Caravan – FWD
- Dodge Caravan C/V, Grand Caravan C/V – FWD
- Chrysler Town & Country – AWD
- Dodge Grand Caravan – AWD
- Chrysler Voyager/Grand Voyager – FWD
- Voyager/Grand Voyager – FWD (Left Hand Drive)
- Voyager/Grand Voyager – AWD (Left Hand Drive)
- Voyager/Grand Voyager – FWD (Right Hand Drive)
REMOVAL – 2.4L
To remove the ignition coil pack in simple terms for the 2.4L engine, follow these steps:
- Start by disconnecting the negative battery cable. This ensures safety and prevents any electrical mishaps during the removal process.
- Locate the ignition coil pack, which is attached directly to the valve cover. The valve cover is the protective cover on top of the engine.
- Disconnect the electrical connector that is connected to the coil pack. This connector carries the electrical signals necessary for the coil pack to function.
- Remove the mounting bolts that secure the coil pack in place. These bolts keep the coil pack firmly attached to the valve cover.
- Once the mounting bolts are removed, carefully take out the coil pack along with the heat shield. The heat shield helps protect the coil pack from excessive heat produced by the engine (refer to Figure 1 for visual reference).
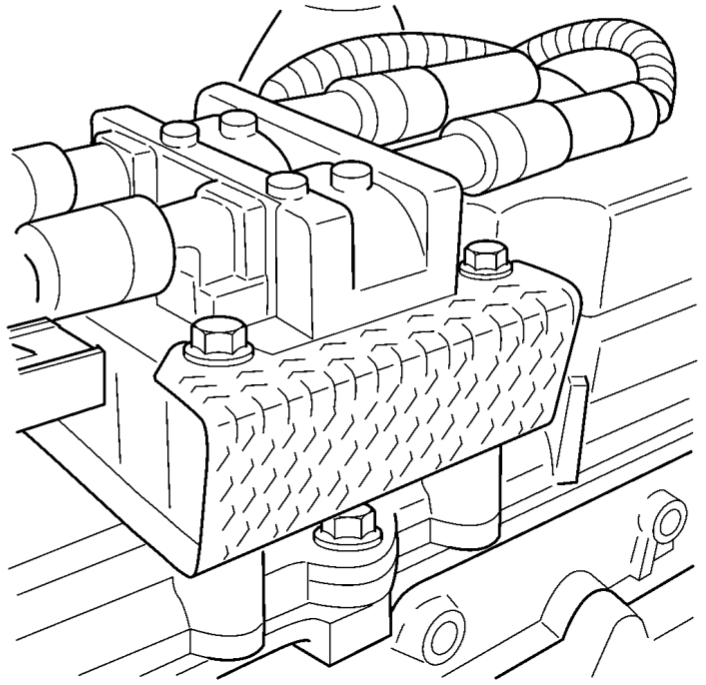
Fig. 1 Ignition Coil – 2.4 Liter
By following these steps, you will be able to safely remove the ignition coil pack from the 2.4L engine. The coil pack is a crucial component responsible for generating the necessary spark to start the engine.
REMOVAL – 3.3/3.8L
Here are the step-by-step removal procedures for the 3.3/3.8L models:
- Begin by disconnecting the negative battery cable to ensure safety and prevent any electrical accidents.
- Take note of the throttle and speed control cables, which are connected to a clip. Carefully remove these cables from the clip.
- Locate the power steering reservoir, which is secured to the intake manifold by two bolts. Remove these bolts to free the reservoir.
- Next, loosen the lower nut that holds the power steering reservoir in place on the ignition coil bracket. This will allow you to reposition the reservoir for easier access (refer to Figure 2 for visual guidance).
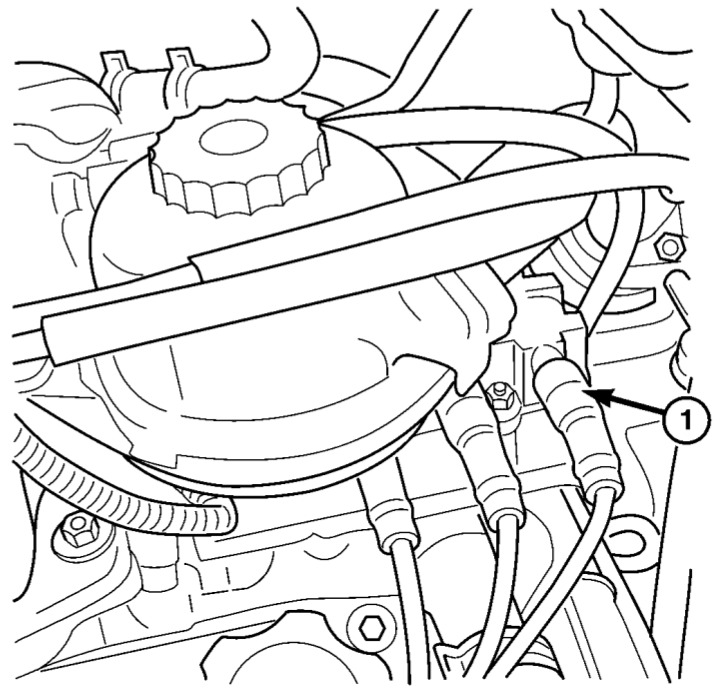
Fig. 2 Ignition Coil – 3.3/3.8L (1- ignition coil) - Now, it’s time to remove the ignition cables from the ignition coil. Take each cable and pull it off the ignition coil, making sure to handle them gently.
- Disconnect the electrical connector that is connected to the ignition coil. This connector carries the necessary electrical signals for the coil to function.
- Finally, remove the two nuts that secure the ignition coil in place on the studs. Once the nuts are removed, you should be able to take the ignition coil out.
By following these steps, you will be able to successfully remove the ignition coil in the 3.3/3.8L models. The ignition coil plays a crucial role in generating the spark needed to start the engine, and by understanding these removal procedures, you can confidently perform the necessary steps to replace or service the ignition coil.
INSTALLATION – 2.4L
- Begin by installing the ignition coil and its heat shield onto the valve cover. Make sure to tighten the bolts securely, as this will keep the coil and shield in place.
- Connect the electrical connector to the ignition coil. This connector carries the necessary electrical signals to power the coil and enable it to function properly.
- Now, it’s time to transfer the spark plug cables from the old coil pack to the new one. Take note that the coil pack towers are numbered, indicating the cylinder identification. Make sure to fully seat the ignition cables onto the corresponding towers, ensuring a secure connection.
- Finally, connect the negative battery cable. This will complete the installation process and restore power to the vehicle’s electrical system.
INSTALLATION – 3.3/3.8L
- Start by installing the ignition coil over the studs on the bracket. Ensure that the coil is properly aligned and seated on the studs.
- Install the two nuts onto the ignition coil studs and tighten them securely. Additionally, make sure to tighten any other bolts that secure the bracket in place.
- Connect the electrical connector to the ignition coil, ensuring a proper and secure connection. This connector carries the necessary electrical signals for the coil to function effectively.
- Next, install the ignition cables onto the ignition coil. Make sure to match each cable to its corresponding position on the coil. Gently push the cables onto the coil towers until they are fully seated.
- Reposition the power steering reservoir as needed. Slide the bracket over the mounting stud, referring to Figure 2 for visual guidance.
Fig. 2 Ignition Coil – 3.3/3.8L (1- ignition coil) - Install the two bolts to secure the power steering reservoir to the intake manifold. Tighten these bolts securely.
- Now, tighten the lower nut onto the stud of the ignition coil bracket. This will ensure that the coil bracket is firmly secured.
- Install the throttle and speed control cables back into the clip. This will keep them organized and prevent any interference with other components.
- Finally, connect the negative battery cable to complete the installation process and restore power to the vehicle’s electrical system.
By following these procedures, you will be able to successfully install the ignition coil in the respective engines. The ignition coil is responsible for generating the spark needed to start the engine, and by understanding these installation steps, you can confidently replace or service the ignition coil.